
Don’t you ever wish to enhance the aesthetic appeal of your photos? Adding sunglasses to a picture is an excellent way to up your style quotient in any photo!
Whether it's for social media or just a selfie to be shared with friends, adding glasses can make you look cool and edgy. There are several ways to add spectacles to photos from online platforms and mobile apps, to desktop solutions!
That being said, this article will explore the best tools to add glasses to photos. We will walk you through a full guide on how to add glasses using these tools and look cool in your photos.
Let’s get started!
In this article
Part 1. Can You Add Glasses to Photos?
So, is it possible to add glasses to a photo? The answer is yes! Adding glasses and any other accessories to photos is perfectly possible. You can add normal nerd glasses or some cool sunglasses in your preferred shades and style.
There is a wide range of tools dedicated to adding accessories to your photos. They let you add glasses to pictures in the form of fun stickers or with powerful AI technology. These tools can be accessed through various platforms including online, desktop, and apps.
Below we’ve gathered the best tools for each platform to help you out. Let’s explore them in detail!
Part 2. What are the Best Tools to Add Glasses to Your Photo Online?
Online platforms are known for their wide accessibility and ease of use. That’s why we’ve picked the two best tools to add glasses to photos online, complete with a step-by-step guide! Whether you’re looking for an advanced AI-powered solution or a fun photo editor, we’ve got you covered!
Let’s first start with the online AI tool.
FaceHub - Best for Adding Glasses to a Photo with AI Online
![]() 4.5/5.0 based on AllThingsAI
4.5/5.0 based on AllThingsAI
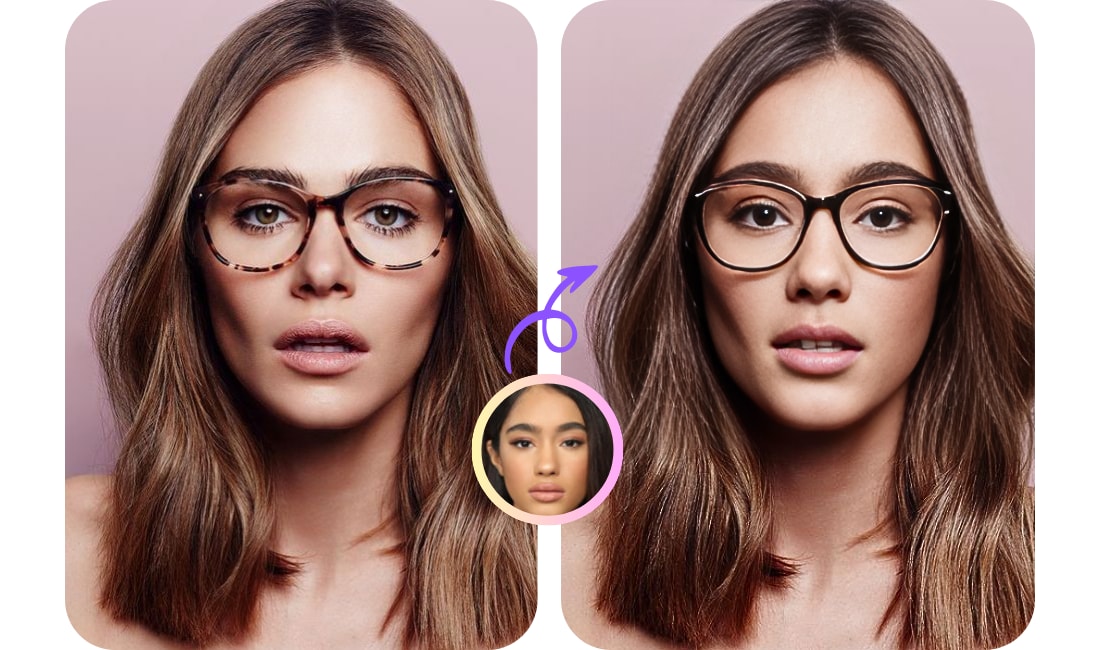
FaceHub is a powerful online platform to add cool glasses to photos in a single click! Powered with AI, it provides an automated solution to enhance the aesthetic appeal of your photos. No need to manually edit your pictures to fit in the glasses. FaceHub automatically places glasses over your face in seconds!

Whether you’re looking to add glasses to pictures with just your face or ones with a full-body portrait, FaceHub handles it all. The cool part? You can add glasses to multiple faces at once! So, if you want to up the edgy quotient in your group photos, FaceHub is full of fun possibilities!
Key Features of FaceHub
Here are some standout features of FaceHub.
- Automatic solution: With its AI integration, FaceHub automatically recognizes your face and places glasses over your photos.
- Mult-face glasses placement: It lets you add glasses to your group photos with over six faces at once.
- Unlimited styles of glasses: It gives you the freedom to swap your face with any type of glasses, opening the doors to infinite styles of glasses.
- Super-realistic results: FaceHub uses 106 facial key points to accurately detect your face and ensure a natural placement of glasses.
- Fast processing: Despite its advanced solutions, FaceHub is super lightweight providing outputs in seconds.
Ready to try FaceHub to look swanky in your photos? Let’s learn how it works below.
How to Add Glasses to Photo Using FaceHub
First, go to FaceHub’s official website and sign up for the platform with your email. Then, follow the easy steps below to add glasses to your photo online.
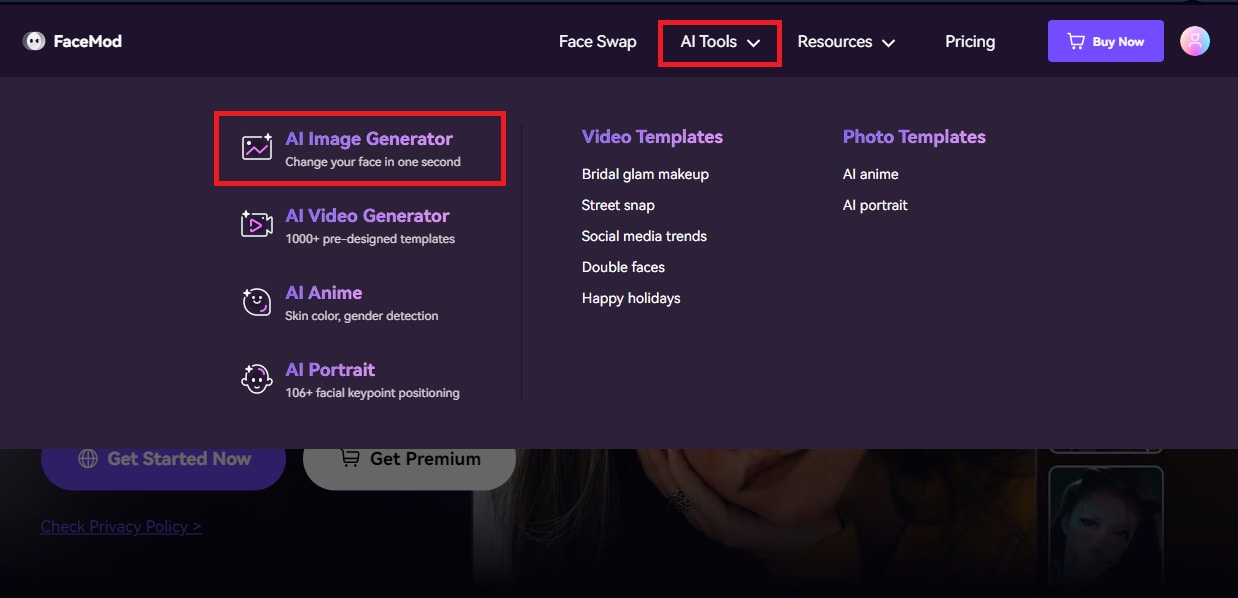
Step 1. On the main page, click on “AI Tools” located in the top menu and select “AI Image Generator.” Or, just click the button below.
Step 2. On the next page, click on “Generate Image Now.” Then, click on “Upload Photo” to add a picture of a person or a celebrity wearing your desired glasses.
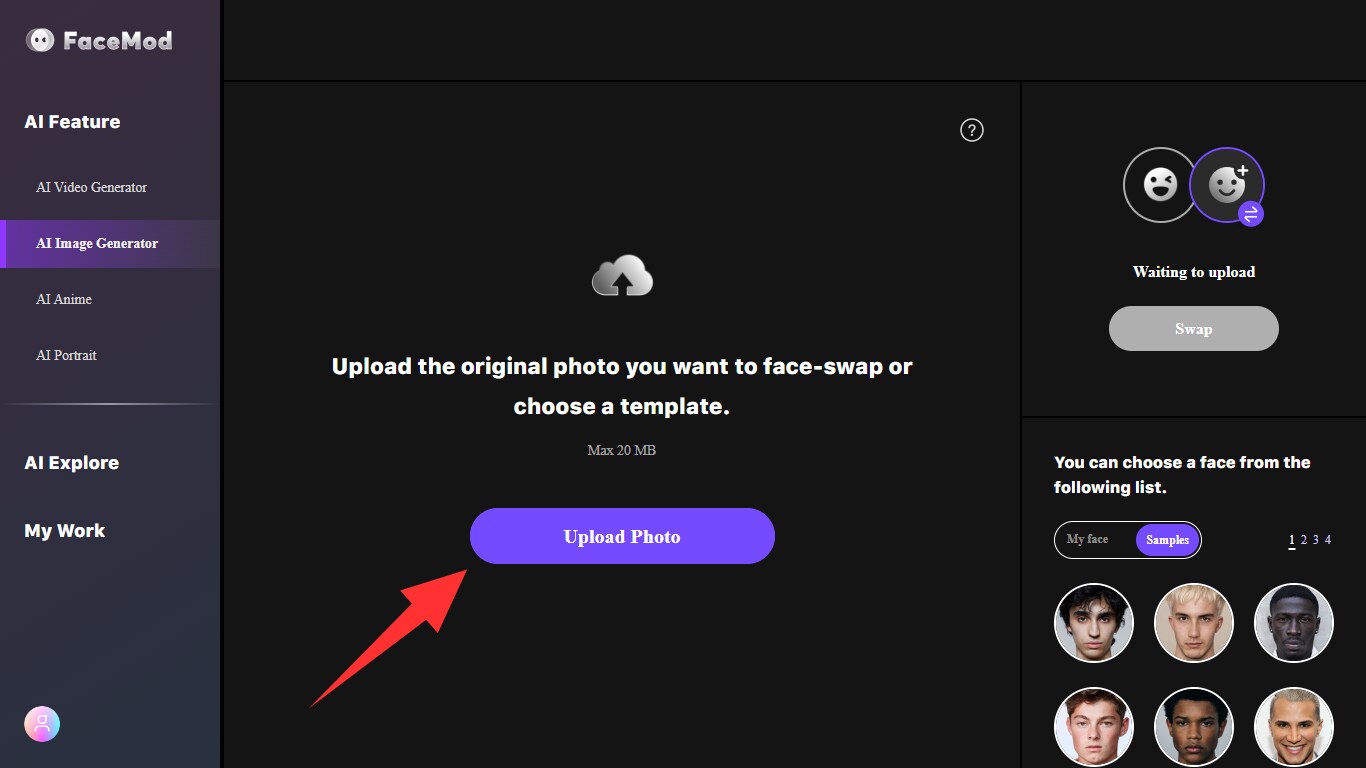
Step 3. Now, click on “My face” in the bottom right to upload a picture to add glasses. Or, select a face from the free “Samples.”

Step 4. Click on the “Swap” button to place glasses over your photo. Once done, check the results and click on “Download” to save the photo with glasses to your device.
And that’s how to add sunglasses to photos online with AI FaceHub. It was easy, right? Let’s find out the pricing of this powerful platform below.
FaceHub Pricing
FaceHub offers various free features including free photo and video templates for face swap. If you want to upload your own photos and videos to add glasses, FaceHub offers the following pricing plans.
- Monthly Plan: $9.99 / month
- Annual Plan: $39.99 / year
Now, let’s move forward and explore another online tool to place glasses over your pictures.
Pixelied - Best Photo Editor to Add Glasses to a Photo Online
![]() 4.7 / 5.0 based on 103 reviews on Capterra.
4.7 / 5.0 based on 103 reviews on Capterra.
Pixelied is a great online platform for those looking to add a fun element to their photos with glasses. Pixelied lets you add sunglasses to photos online for free with its extensive range of 2D glasses icons. From nerd glasses to stylish sunglasses of various shapes and sizes, there is so much to explore. It also offers several graphic design tools to elevate the aesthetic vibe of your photos.

Here are the pros and cons of Pixelied.
Now, let’s find out how to add eye glasses to photos with this tool.
How to Add Glasses to Images Using Pixelied
Here is a step-by-step guide to adding glasses to photos with Pixelied.
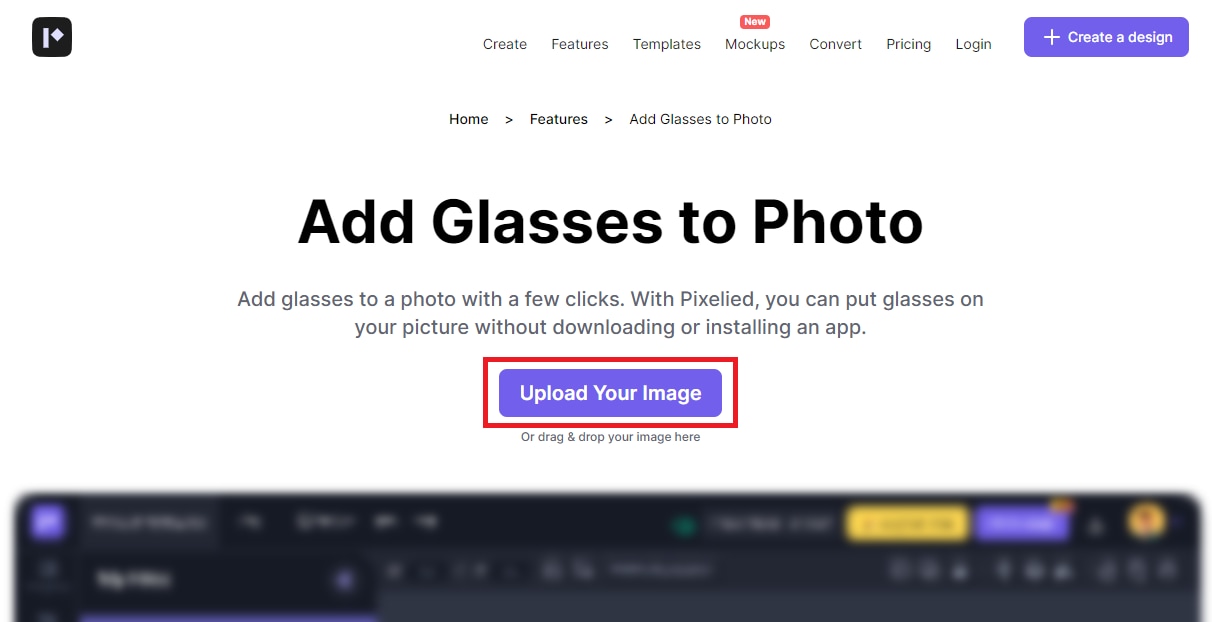
Step 1. Go to Pixelied’s Add Glasses to Photos feature and click on “Upload Your Image” to import the picture to add glasses.
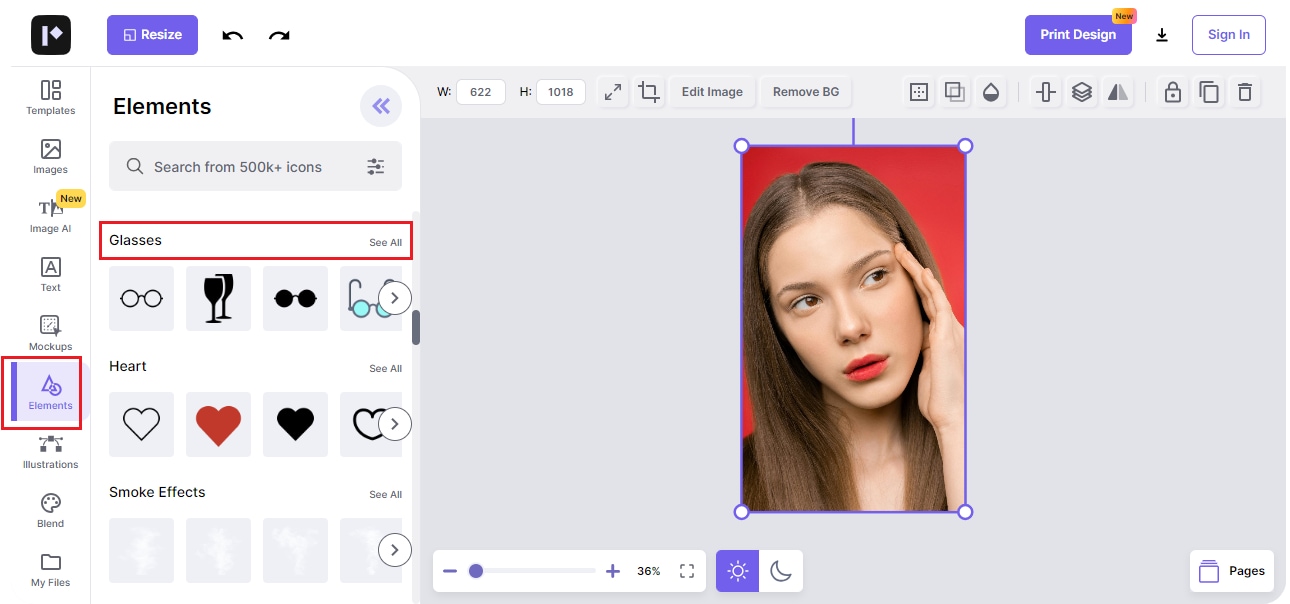
Step 2. Now click on “Elements” from the left panel. Click on the “See All” option next to the Glasses section to access all of the glasses icons.
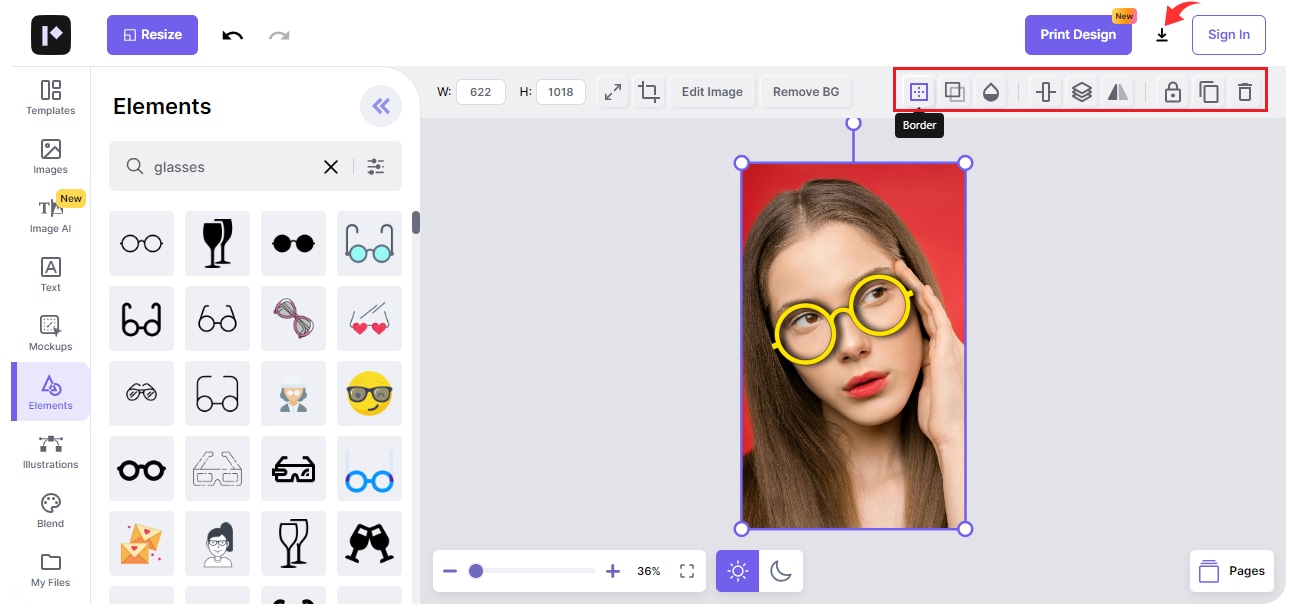
Step 3. Select the glasses you want to add and adjust their position over the image. You can also adjust the Border, Shadow, Opacity, and more from the top toolbar.
Step 4. Once you’re done, click the down arrow button near the top corner to save and add glasses to photos for free.
That’s all! Now you’ve added some fun glasses to your photo online with Pixelied. But we’re not done yet. Below we’ve shared some great mobile apps to add glasses to photos!
Part 3. What are the Best Apps to Add Glasses to Photos?
Mobile apps are a great solution to add eye glasses to photos right on your smartphone! Especially AI-powered photo editing apps are a game-changer in recreating picture-perfect moments.
Here are some of the best apps to add glasses and sunglasses to pictures!
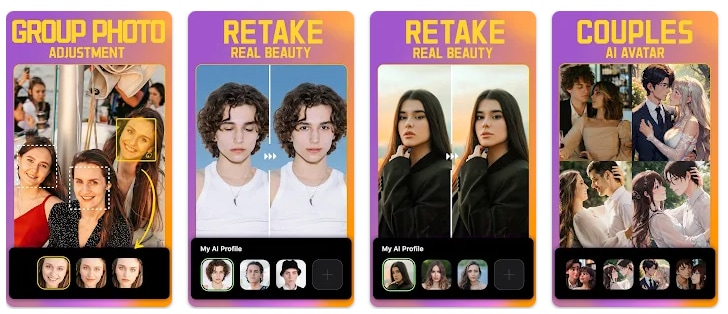
SelfieU - Best App to Put Sunglasses on Photo
![]() 4.6/5.0 based on 101k reviews on Google Play.
4.6/5.0 based on 101k reviews on Google Play.
If you want to add sunglasses to photos using a text-to-image generator tool, SelfieU offers a great solution to try. Its AI Transform feature lets you draw the shape of sunglasses over the photo to place real glasses over it Apart from this, SelfieU offers a full suite of rich photo editing solutions to effortlessly up the style quotient in your pictures.
Now, let’s find out how to use SelfieU to add sunglasses to photos.
How to Add Sunglasses to Photos with SelfieU
Download and install SelfieU on your phone. Then use the following steps to add spectacles to photos using SelfieU.
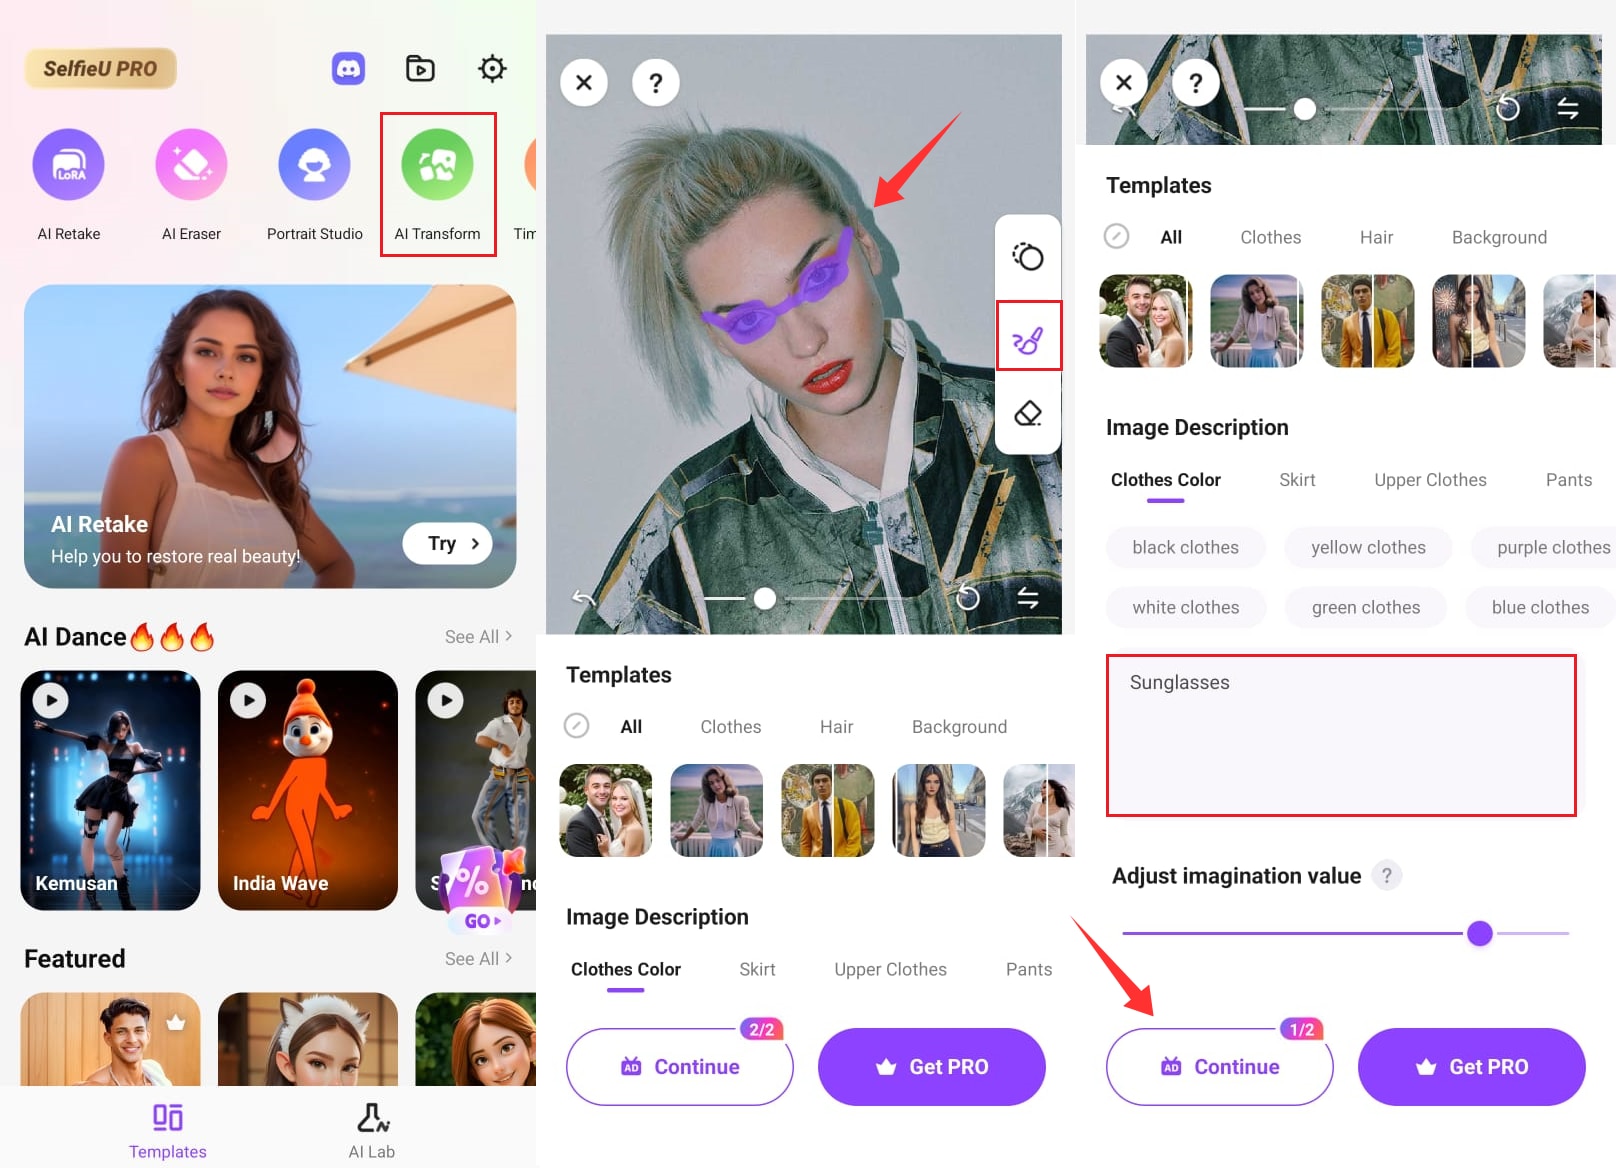
Step 1. Open the SelfieU app on your phone and tap on “AI Transform”
Step 2. Select your picture and draw the shape of sunglasses over the face. Scroll down and write “Sunglasses” in the text field.
Step 3. Click on “Continue” once done to place sunglasses over the photo.
That’s it. Simply save your picture with sunglasses and share it with your friends! Now, let’s explore our next app.
PicsArt - Best to Add Nerd Glasses
![]() 4.0 / 5.0 based on 12M reviews on the Google Play.
4.0 / 5.0 based on 12M reviews on the Google Play.
Picsart is the best app to add glasses to photos! You can place glasses over your photo with its AI Replace tool. But beyond that, Picsart offers a diverse range of high-quality stickers of glasses to place over your pictures. You can customize these stickers as per your preference.
Now, let’s explore how to use it to put specs on photos.
How to Add Glasses to Photos with Picsart
First, download and install PicsArt on your phone, then follow the steps below to add glasses to your picture.
Step 1. Open Picsart on your phone and tap the “+” symbol to upload your photo.
Step 2. Click on the “Tools” option and select “AI Replace.” Now, use the brush to draw any shape of the glasses.
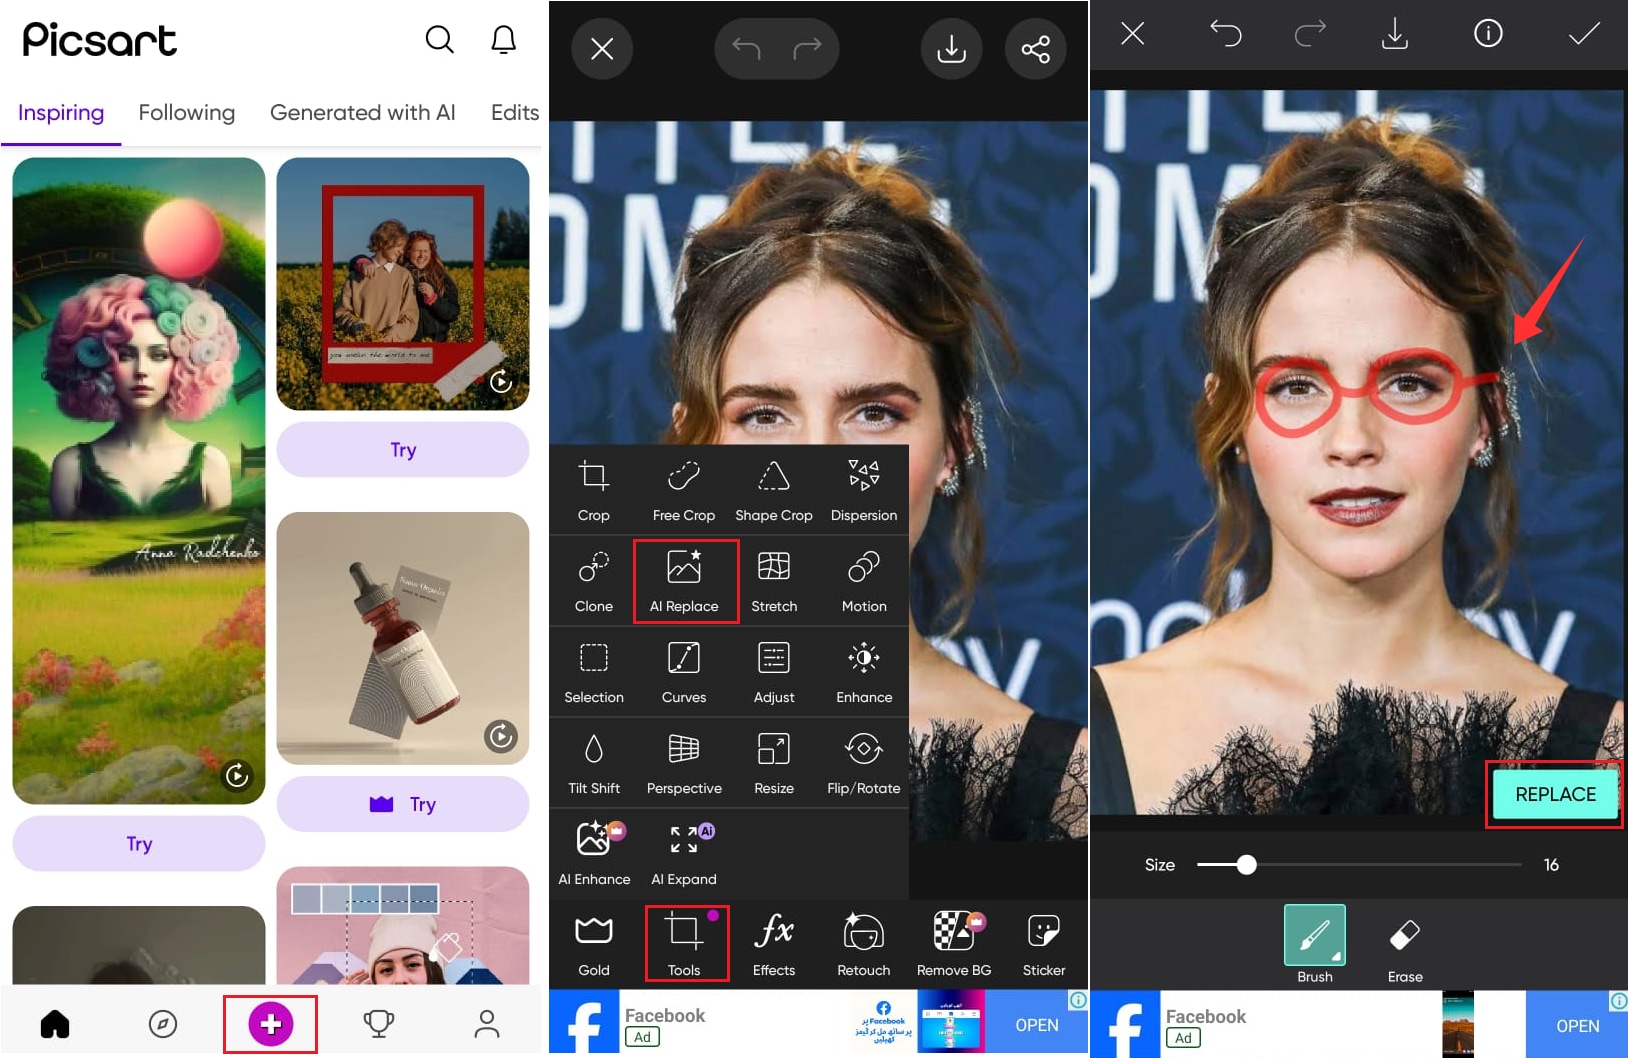
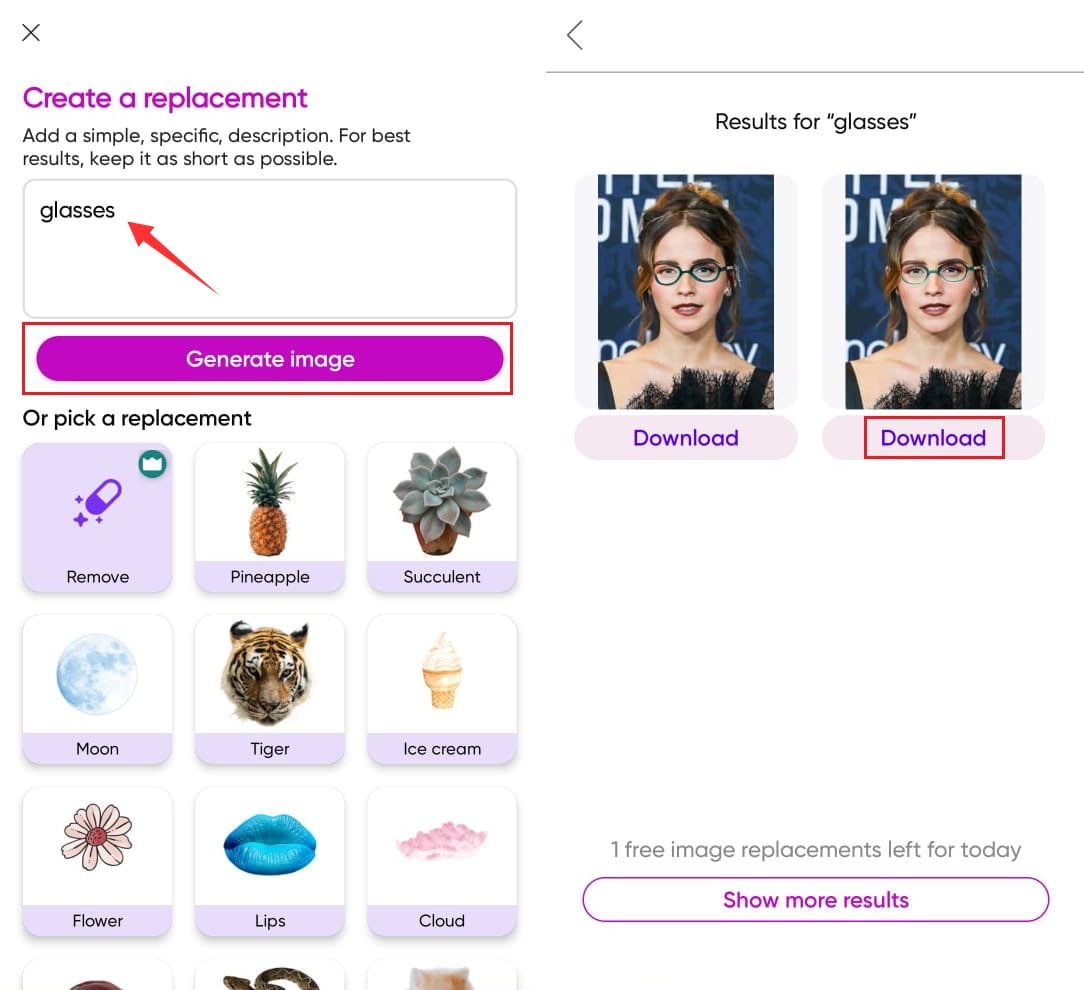
Step 3. Tap on “Replace” once you’re done and write “Glasses” in the text field.
Step 4. Tap “Generate Image” to put glasses on the photo. Then, tap “Download” to store the photo on your device.
Now you’re all done adding glasses to photos with Picsart. If you’re looking for a desktop solution to add eye glasses to photos we’ve got a handy solution for you below!
Part 4. Bonus Tip: Add Glasses to a Photo with Photoshop
Photoshop offers a full-fledged desktop solution to add glasses to your photos offline. With its advanced editing features, there is no end to the possibilities to enhance the aesthetic of your pictures. With its latest Generative AI tool, you can add glasses to photos without the need for manual editing.

Photoshop Ratings
![]() 4.6/5.0 based on 12,929 reviews
4.6/5.0 based on 12,929 reviews
Now let’s find out how to add glasses to a photo with Photoshop
How to Add Glasses to Photos with Photoshop
Here are the steps to use Photoshop to add glasses.
Step 1. Open your desired photo and a transparent image of glasses with Photoshop. Then copy and paste the glasses over your picture.
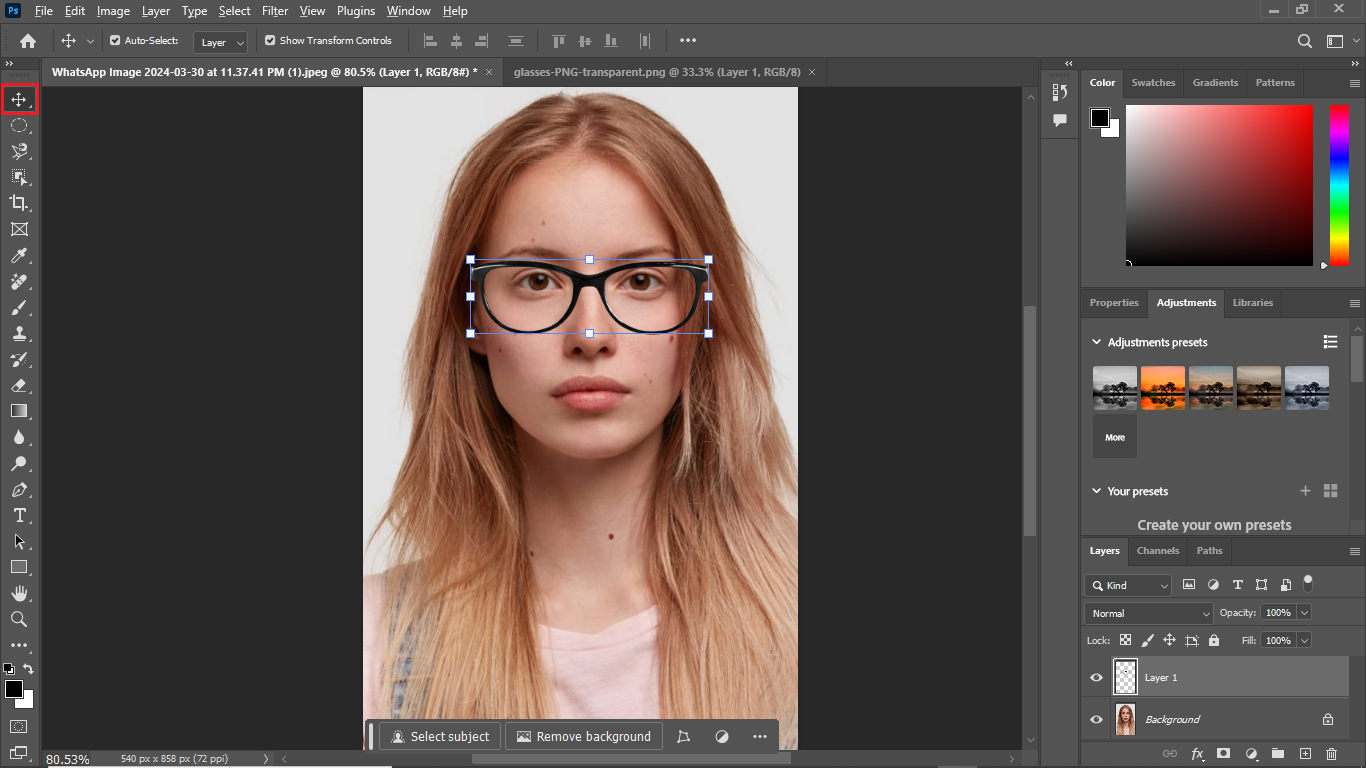
Step 2. Adjust the size and position of the glasses with the “Move Tool.” Select the glasses layer and go to the Layer tab. Select “Layer Style > Bevel & Emboss” from the list.
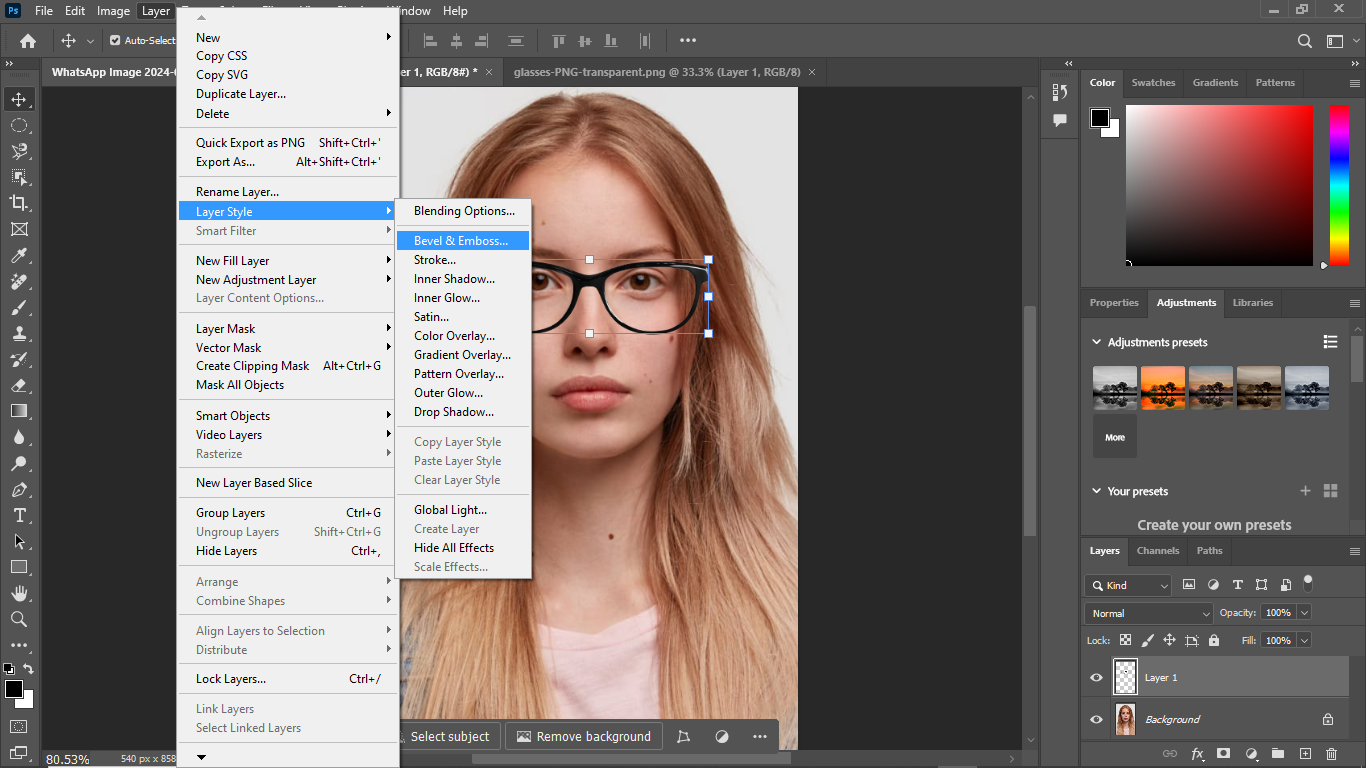
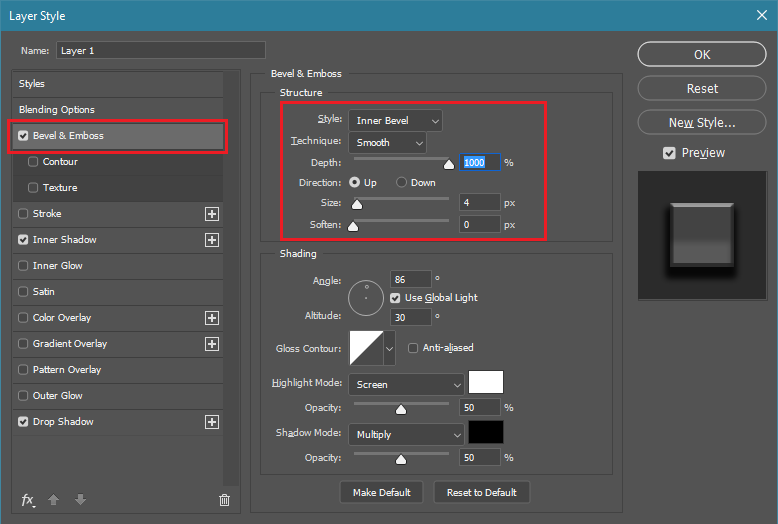
Step 3. Check “Bevel & Emboss” and set the “Style” to “Inner Bevel.” Adjust the “Technique” to “Smooth” and set the Depth and Direction.
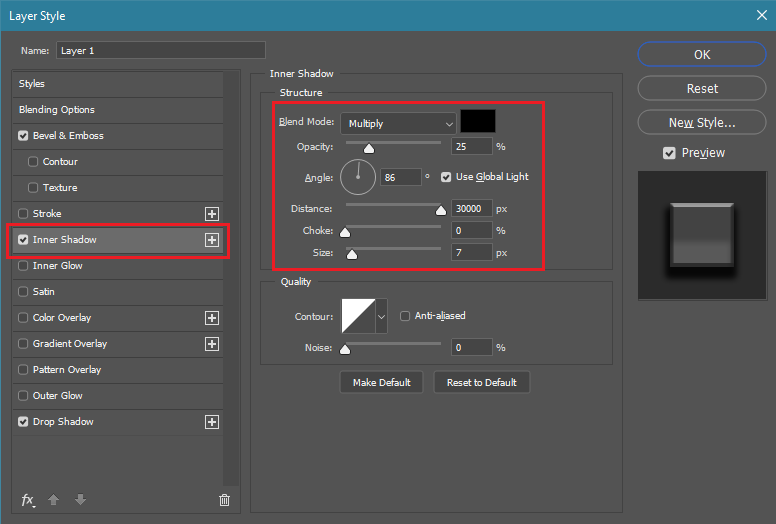
Step 4. Select the Inner Shadow and set the Blend Mode to Multiply. Adjust the shadow opacity, angle, and size.
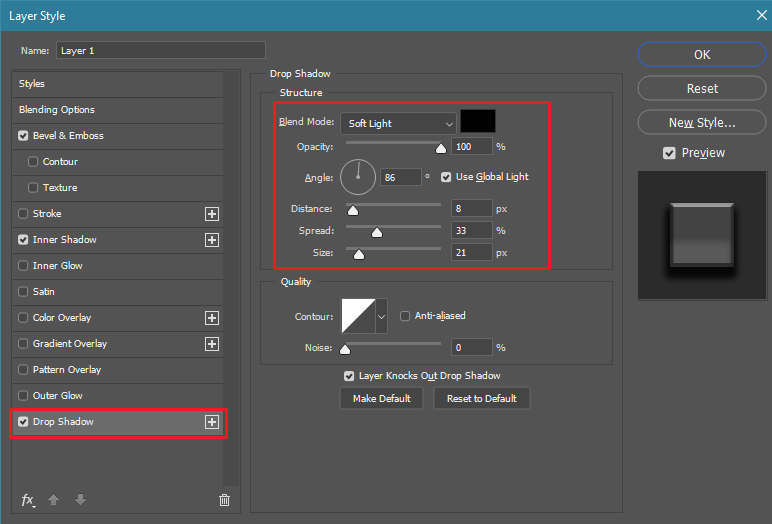
Step 5. Select Drop Shadow and set the Blend Mode to Soft Light. Adjust other shadow settings and click “OK” once done.
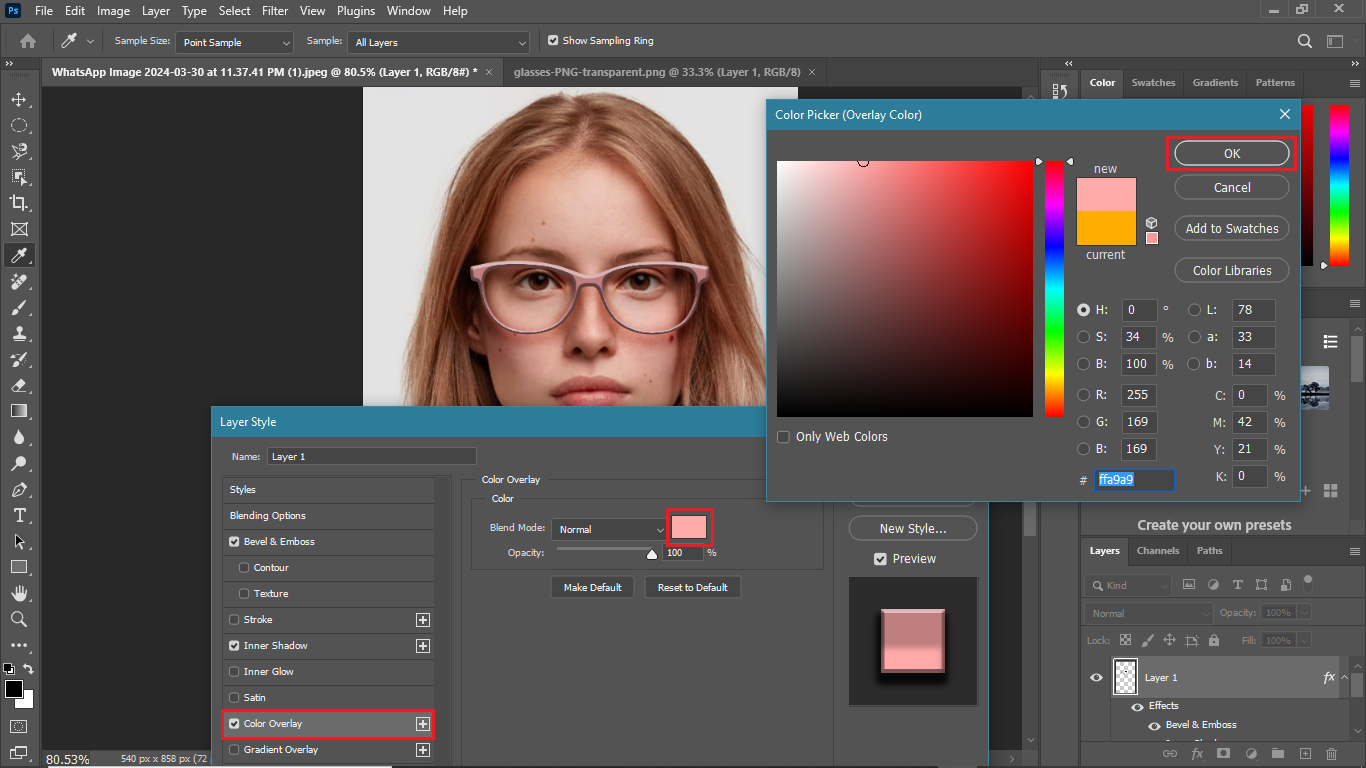
Step 6. Select “Color Overlay” and click on the color swatch to adjust the color of the glasses. You can adjust the tone of the original color for a natural look or change the color altogether.
Now you’re all done adding glasses to the photo. Go ahead export the picture to your device and share it on social media!
Conclusion
Adding glasses is a fault-proof way to enhance the aesthetic appeal of your photos. You can use online tools, mobile apps, or a desktop program like Photoshop to easily add glasses to photos. While all the tools offer a great solution, FaceHub stands out with its advanced AI-powered solutions that are super easy to work with. From nerd glasses to designer specs, the possibilities to upgrade your photo’s style quotient are endless!