FaceHub User Guide
How To Manage My Works on FaceHub?
There's always a question from the user about what happens to the user's personal work across a particular tool. FaceHub, while offering access to view personalized data, can also be used to manage it. In this guide, learn how to manage your FaceHub details across the "My Work" section.
Part 1: Manage My Creations
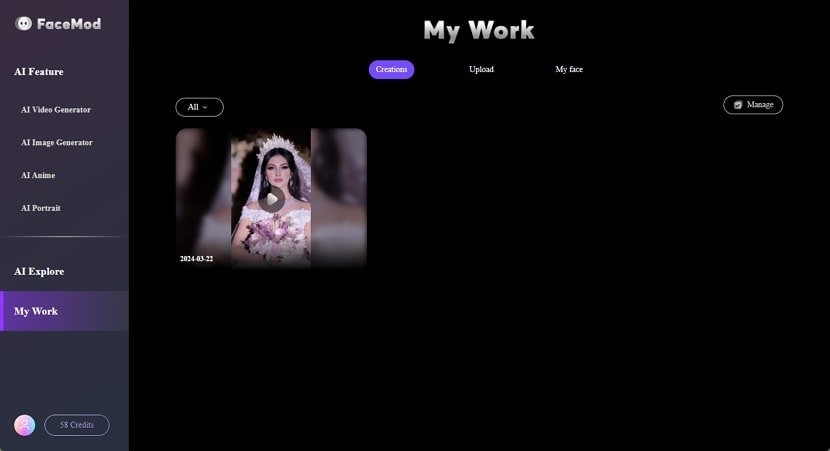
For starters, the first operations come with managing your creations that have been created across FaceHub. All your generated creations can be discovered in the “Creations” tab of the “My Work” page. To perform simple management, follow the instructions provided next:
Access the Creations Tab on FaceHub
After finding yourselves in the main editing window of FaceHub, progress into the “My Work” section from the left panel. Following this, select the “Creations” tab from the top to display your created content.
Download Your Pre-Created Work
If you are interested in downloading any of your creations, select it and wait until it opens in the preview window. When it opens, click the "Download *file" button and save it on your computer.

Delete Created Content on FaceHub
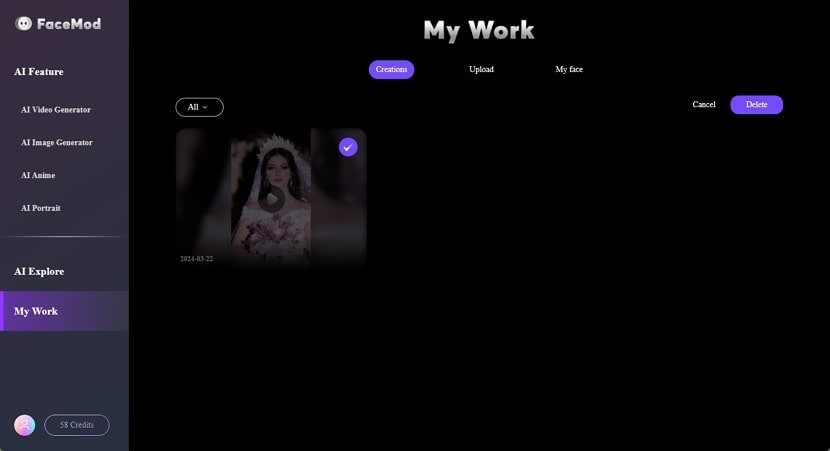
You can delete your created content across FaceHub to ensure user privacy. For this purpose, select the "Manage" button on the top-right section of the window and select the specific data you wish to remove. After selecting it, look for the "Delete" button to remove all creations.
Part 2: Delete Uploaded Materials
Any uploads added across FaceHub can be found across the "Upload" tab in the "My Work" section. However, to avoid cluttering of data, it is best to have it removed, which is done as follows:
Delete Single File From Upload Section
Access the "Upload" section at the top of the "My Work" tab. With all the uploaded data coming onto the front, you can easily delete anything by right-clicking on the uploaded content and selecting "Delete."

Manage Deleting Multiple Files
Conversely, use the “Manage” button to select all data that needs to be deleted, followed by tapping the “Delete” button only once after selection.

Part 3: Delete Face or Add Face
When you swap a photo or video with your personally uploaded face, it gets saved in the “My face” section across your “My Work” tab. To understand how it is managed throughout this section, investigate the brief steps as follows:
Delete Faces From FaceHub
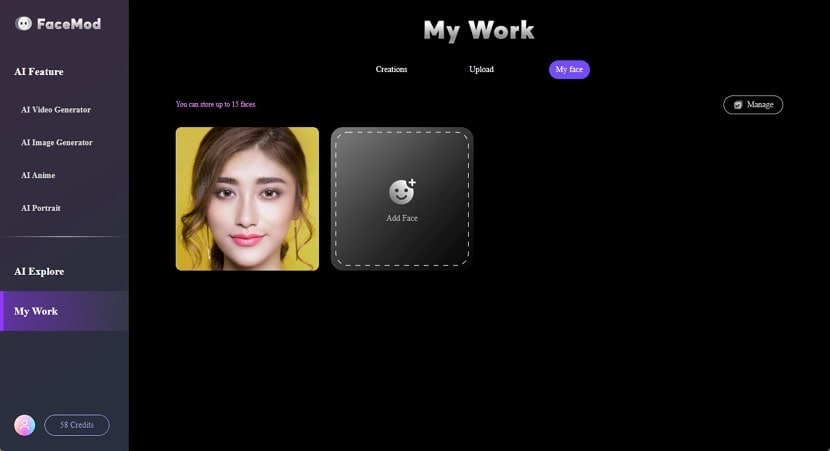
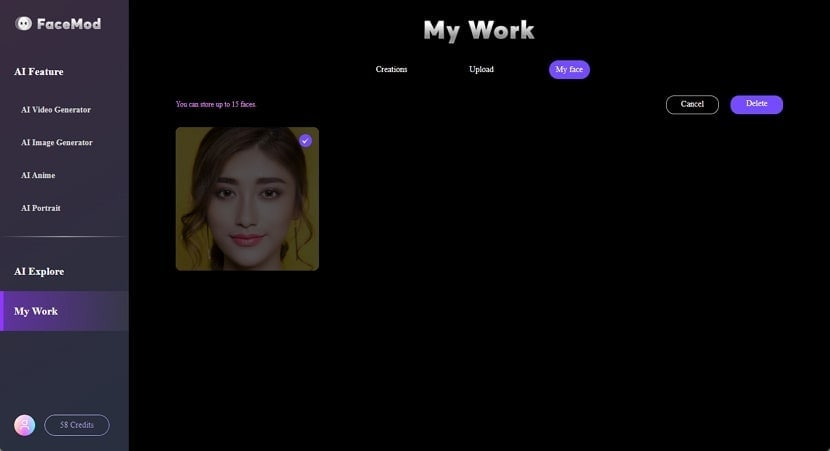
Redirect into the "My face" section in the "My Work" tab to find the faces uploaded across FaceHub as a swapping option. To delete one, access the "Manage" button and select the faces to find the option of "Delete."
Add Face in FaceHub Data Management
However, if you wish to add faces as options to swap faces when using FaceHub, use the "Add Face" button to browse the respective media content, which will be analyzed upon uploading.
